
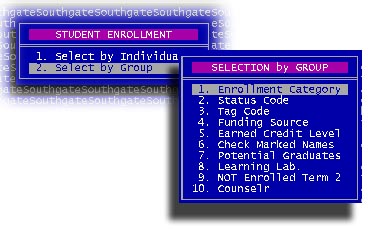
The Student Enrollment Data option has two sub-menu options. 1. Select by Individual allows you to go directly to the student screen and open individual student records recalled by Name, Social Security Number of Other name.
The 2.Select by Group option presents you with another menu where you may make a number of selections to narrow your search for a group of students with similar attributes. Once you make your selections to narrow your group, the records will be presented to you one at a time. You may enter or edit any data for a student then press PageDown to advance to the next record.
What's on the Student Data Screen?
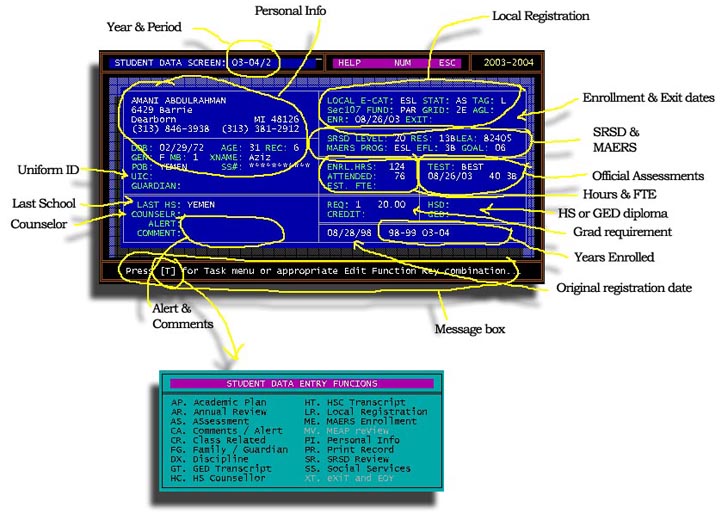
Everything that the database knows about a student may be accessed and verified from this screen using the Task menu. Press the letter T to pop-up the Task Menu. The options may be accessed by using the arrows to move the highlight then press Enter or simply type the two letter combination. Hint: the Hot Keys are the two letters in uppercase in the title of the option. Here is a review of each item on the Task menu. Items are in alphabetical order.
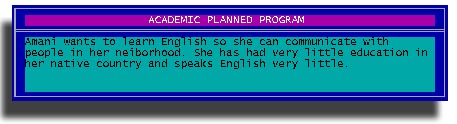
This is a requirement for adult students who must be reported via MAERS. Right now this is a narrative of background and goals for the ABE or ESL student. For adult HS completion students, the graduation requirements suffice as their Planned Program and for GED students, passage of the five components of the test battery is the plan. The Academic Plan is only revealed when you visit the option, otherwise there is no evidence of the plan on the student data screen. The folks in Lansing are working on "revising" the plan and renaming it Adult Learner Plan.
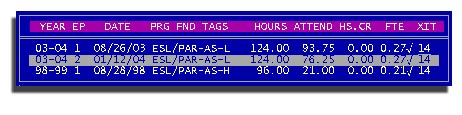
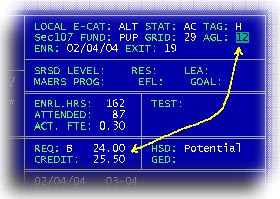
You can do two things with this guy. First, you can see all of the years /
enrollment periods a student has been registered. Additionally you can see the Date
they enrolled, Program, state Funding, local Tags, number
of hours registered, hours attended, HS credit earned, FTE
generated (checkmark indicates actual FTE counted) and the code of the exit
reason from each period. The Annual Review is only visible when you press
"AR".
Also you can select any year / period combination and STUREC(c) will focus that for display of classes, attendance and grades for that and any other data that is tied to a specific year and or enrollment period. To select an enrollment period, use the arrows to move the pointer then press Enter.
Notice that some items on the sub-menu may be 'grayed out' that means that that option is not available or not appropriate for the current student. In this example, we have an ESL student in focus and only youngsters (under 20) are eligible for the MEAP tests, therefore the MEAP related functions are grayed out.. In sub-menus with numbers, you may press the number of the item or use the arrows to move the highlight then press Enter to access a function or operation.
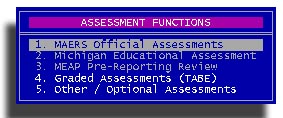
For certain adults that will be reported via MAERS, you will use the Official Assessments
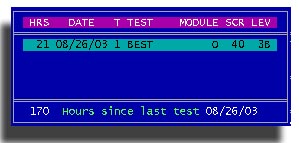
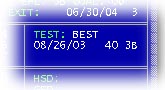
You enter the Date of the test, a 1 if it is a pre-test or a 2 if it is a post-test, the Name of the test, the Module and the standard score. STUREC(c) will calculate the correct EFL from a lookup table. Simply follow the instructions found at the bottom of the panel that will accompany every step of the data entry process. Official assessments are visible on the right middle of the student screen.
You may record regular old Graded assessments for any student. These tests will not be visible on the student screen.
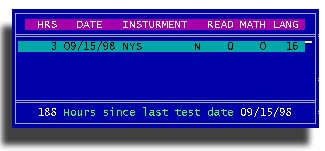
Here you will enter the Date of the test, the name of the test Instrument, whether it is a grade equated score (Y) or a standardized score (N) if appropriate. Then you may enter any or all scores for Reading, Math and Language on one line. These Graded assessments are not used for any official purpose, only for your local use.
You may also use Other / Optional Assessments for any student. These tests are not visible on the student screen but they can be printed along with a transcript.
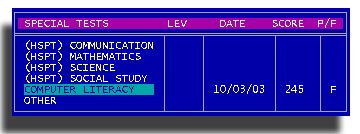
Again, these are not used for any official purpose, only for your local use. You may modify the name of any test on this panel by simply moving the highlighter then press Enter. You will be asked for an optional test level. Date and Pass or Fail are required. Score is optional.
If you have a youngster (under 20) on the screen, you will see this assessment menu. Now the MAERS related item is grayed out and not available.
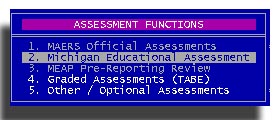
Notice that item 2. Michigan Educational Assessment is highlighted and the MAERS Official is not. The MEAP panel looks like this.
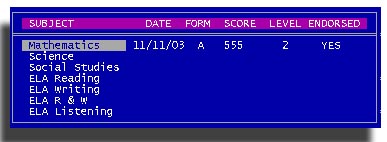
You will enter the Date, the Form code and Score on the appropriate line and STUREC(c) will calculate the Level and Endorsed based upon current standards. There is no evidence of MEAP scores on the student screen after you close the panel. Item 3. MEAP pre-reporting review is not available because the state has not released information on how the data can be electronically transferred.
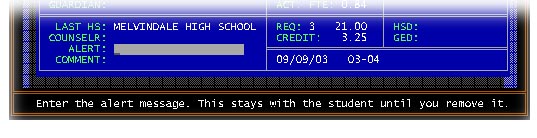
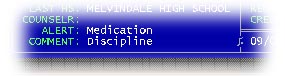
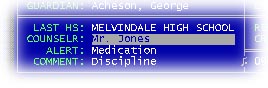
Notice the message in the message box at the bottom of the screen You may enter any keywords or phrase that may be important for you to be able to see immediately upon retrieving the student record. Enter only the minimal words to express your idea because this will show to anyone who views this screen. The full text of the message will be viewable when you press Enter. You may want to be careful how you word your comments and the spacing.
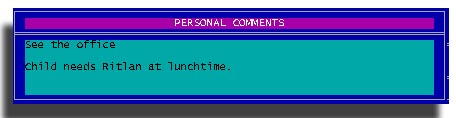
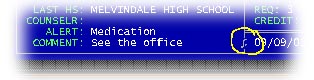
A little musical note will appear on the student screen to remind you that you have comments (notes) available.
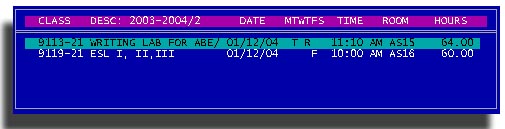
This option will bring up a list of the student's registered classes for the selected enrollment period. An adult ABE or ESL student may have a schedule similar to this.
You have several options with this panel. Read the message box for step-by-step guidance throughout the process.
Add a new class to the schedule by pressing the <+> plus sign. You will be asked for the course code and section number. If the course is at maximum, you will be asked if you want to Force enrollment or put the student on a Waiting list. If the class you selected was setup as an "Exception" class, you may edit the days the student will attend class and to verify the number of hours per class they will commit to. See this document for more information. STUREC(c) will calculate the total number of class hours and the appropriate FTE value. Finally verify the registration date.
Drop an existing class from the schedule by pressing the <-> minus sign.. You will be asked for the effective drop date and drop reason. The drop reasons are coded to an age appropriate validation list. Use the question mark [?] to see the list.
Transfer one class to another by pressing the </> slash. Use this cautiously. Use of the transfer is only appropriate during count week. Normally you should use drop and add. Transfers are not appropriate for learning labs or ABE / ESL classes. Their only appropriate use is in providing a thread of continuity for high school credit classes. Transfers are only appropriate between like classes. For example a literature class to another literature class or a history class to another history. Transfers are not appropriate between a math class and underwater basketweaving! This process has two parts. First you identify the class the student wants to transfer out of and supply an appropriate date, immediately you will asked for the class to transfer into. Make sure you have the correct class code and that the class is properly setup otherwise the transfer will be broken.
early Completion is initiated by pressing the letter <C>. If a student completes the course requirements before the scheduled end of the class, you may want to perform an early completion. You will be asked for an effective date, the final grade and credit earned, if appropriate. Normally, only high school credit classes are early completed. Not appropriate for ABE or ESL classes. When it comes time to print class lists an early completion will be treated the same as a drop so it does not print on the attendance sheets and confuse your teachers.
Zap a record with the letter <Z>. This is only appropriate in the case where you may have made a mistake and registered the student in the wrong class -- and they have no recorded attendance. You will be reminded of any attendance then asked again if you are sure you want to remove the record. Zap is permanent. A zapped class cannot be recalled. Use cautiously.

An Alternative youngster's schedule may look like this
Attendance To view / edit the Attendance simply press the letter A
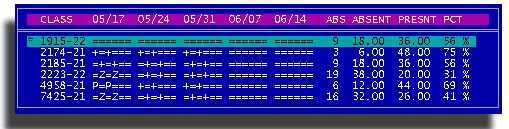
Use the arrows to move the pointer then press the Enter key to enter edit mode. You may change anything you like, it's your data. You may use the Control-LeftArrow and the Control-RightArrow to cycle left and right through the calendar. There is a lot of information here. The class code and name, the number of times absent, the number of hours absent, the number of hours present and the percentage of present. Equal signs in the display represent days the student is not scheduled. Plus signs represent days the class is scheduled, but the attendance has not been recorded. The letter "P" indicates that the student was present for the full scheduled class time. An integer number indicates the hours present less than the fully scheduled time. The letter "A" represents an unexcused absent as does the number zero. The letter "Z" is a generic excused absence, the letter "T" means the student was tardy. Other letters of the alphabet may be associated with various excused absence reasons. You may set these up as may be appropriate locally. See Menu:7.3.3.6. Absence Codes. When you press the Escape key to leave this attendance display, you will be asked if you would like to print this attendance.

Answer Yes and you will see this option menu.
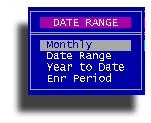
Selecting Monthly will allow you to choose any month in the school year and only the attendance for that month will be printed. Date Range works the same way, you will supply a beginning and ending date. If the date range you enter results in more than 26 weeks, only the first twenty-six weeks will be printed. If you select the Year to Date option, only the last 26 weeks will be printed. Of course, selecting Enrollment Period will print only the selected enrollment period.
Grades Pressing the letter G will display the Grade portion of the schedule.
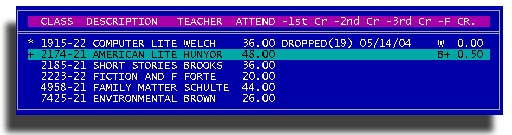
Use the arrows to move the pointer then press the Enter key to enter edit mode. You will be able to visit all Interim marking periods that you have setup for each class. You may give a grade/credit pair for each marking period and the Final. Interim marking periods are only appropriate for high school credit classes. A grade of "W" indicates withdrawn and must be accompanied by a date and reason. STUREC(c) automatically inserts a W whenever you drop a class. On the left end of the line the asterisk indicates a dropped class. The plus sign indicates a completed class, whether early or normal. An interim grade does not create a completion, only a final grade is a completion of the class. When you leave the grade panel by pressing the Escape, you will be reminded to post grades to the transcript and you will be asked if you want to print a report card.
Report card To print a Report card with the schedule visible, simply press the letter R and follow instructions.
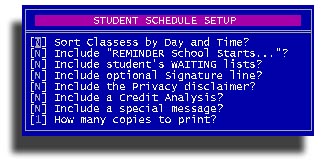
Print a schedule. To print a student schedule, press the letter P and you will see an options menu.

The 1.Administrative option makes particular sense when a student is registered in one or more lab classes. This new option will list the learning laboratory then indented a few spaces will be listed the Academic Components of the lab. The labs and their component classes are listed in course code sequence. For a student who does not have any labs on their schedule, you will see no difference.
2.Student Current will list only the classes in which the student is currently active. The drops and early completions are not printed so as not to confuse the youngster.
3.Re-Enrollmnet is handy for academic advisors. It is basically a blank schedule with lines for the advisor to write down the class codes the student will be taking. This can then be turned over to the data entry person for accurate input.
4.Registration form prints nearly everything you know about a student along with his/her schedule. Handy for alternative ed.
With all three of these options you will have a number of additional options to completely customize your report.

You may enter any contacts for this student and identify the relationship. STUREC(c) will search both the student and contact databases for a match to help prevent duplicates. Just follow the instructions in the message box. A list of all contacts and relationships will be maintained for each student. The primary contact name will be placed on the student screen next to the Guardian label. This would normally only be used with youngsters, but is available for all students.
Discipline notes are only appropriate for youngsters funded as Pupils or Shared Time. You will have two options.
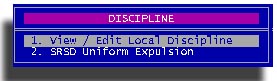
This will bring up the local discipline panel.
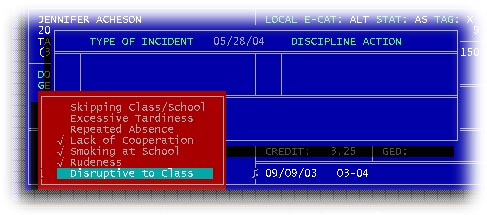
You start by putting the incident date then you may select up to three offences. You may create your own list of offences. Then you can select up to three standard actions.
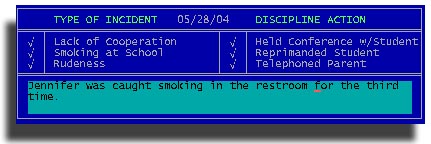
Along with notes. Discipline notes are tied to the academic year and will show a little mark to remind you that this student has discipline on file.
It is subtle, but it's supposed to be. If you suspend a student for one or more days that will be noted
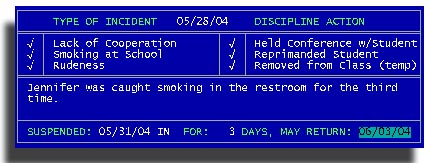
The suspension information is triggered by the "Removed from Class" action. Once a suspension has been recorded, the Comment changes to the word "Discipline"
Now if your school board has "Expelled" your student, you must record this via the Michigan Uniform Expulsion Report which looks like this.

Follow the instructions in the message box and answer all questions. This data will be included in the next SRSD reporting cycle.
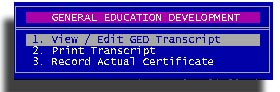
This panel is available to all students, but is particularly important with your GED preparation students.
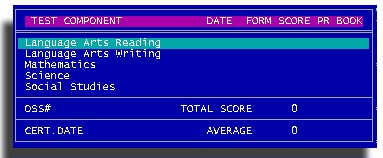
You enter the Date, form code and score for each test. Optionally you may enter a Percentile Rank and a local book code. STUREC(c) will dynamically maintain the total score and average. It will also indicate if the battery is Incomplete, Passes or Failed. You must enter the OSS number and Certificate Date. You may change the screen display order of the test components for your convenience. See this document. In order to properly report progress on GED students, you should maintain this data in a timely manner. If you don't want to record the individual test components, you may simply use option 3 on the sub-menu to record the actual certificate number and date. When you enter a GED Certificate date, STUREC(c) automatically records this in the Achievement portion of the MAERS record and the SRSD record. You may enter the OSSID number before the student earns the certificate.
No-brainer here, eh? Just enter the counselor's name. There is no look-up or validation list for this.
All students registered as high school completion, whether they be youngsters or adults need an accurate and up-to-date transcript of the earned credits that your district has accepted. Remember, you are essentially continuing a legal document of the student's high school career.
These are the options available.
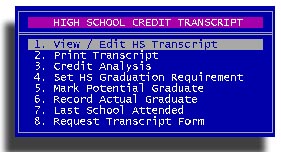
Before you even think about any of these options, you must set the student's HS Graduation Requirement. You may create up to 36 different sets of graduation requirements. See Menu:5.7.Graduation Requirements to establish sets of requirements for your school.
Selecting 1.View / Edit HS Transcript will present you with a list of the grade level / year / school for which you have recorded transcript information. On each row you see the grade level, school year, school district granting credit and the total number of credits earned at that school. We call these the pages of the transcript. At the bottom of the panel you see the total credits earned for all schools. Here is a typical alternative student transcript.
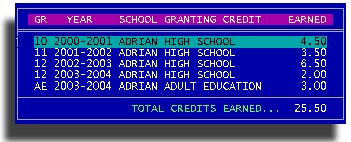
Select an item from the list above to view the detail listing of a particular grade / year / school. We call these the details of the transcript.
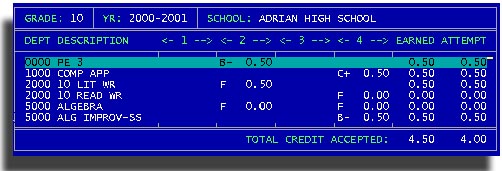
The detail listing shows the department the credit belongs to, the course name and up to four enrollment periods with grade and credit earned in each, the total credits earned for the year for that course and the number of credits attempted. If you expect to calculate an overall Grade Point Average, you must have the credits attempted entered accurately. Historical credits (credits earned outside of your program), should be entered using the generic department code.
STUREC(c) automatically creates proper transcript pages and details from final grades at the end of each enrollment periods after Final grades are entered. See Menu:3 options 2 and 4.
To create a new transcript for a transfer student, read the message box at the bottom of the screen. You will be prompted to press the Plus sign [+] to Add a new page.
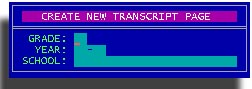
Enter the Grade Level of the credit you are about to enter. Your choices are 9, 10, 11 or 12, or HS for generic High School level and AE meaning either Alternative Ed or Adult Ed. Next enter the school year the credit was earned and finally the name of the school from whom you are accepting credit. This example shows grade level 9 in 1999-2000 school year from Kalamazoo Public.
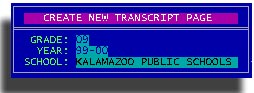
Accept that and continue. You just created a transcript page, but it is empty.

Press Enter to select this new page and you will see the empty details page. Press the Plus sign [+] to add detail items.
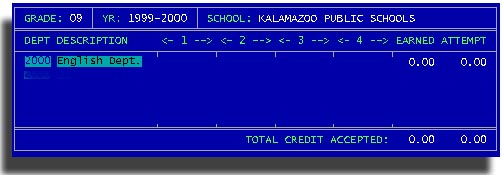
Enter the Department Code of the class you are recording. You may change the description to one more representative of the original class. For instance "9th Grade English" might be more appropriate. The course name which came from the transcript received from the original school. Then you may enter the grade and credit earned in the appropriate enrollment periods.

STUREC(c) will calculate the total credits earned in the class from the credits earned each enrollment period and it will guess at the credits attempted for classes that have passing grades. You must verify the correct credits attempted as STUREC(c) has no way of knowing what the original credits attempted may have been at the other school. Continue this process for all classes and all years for which you have historical transcript information. You should enter the details on a class-by-class basis rather than opting for the apparently easier way of lumping a bunch of stuff together to save you data entry time. This just reduces accuracy and can cause confusion. Remember, there is no such department as "Electives". By definition, Electives are those classes a student elected or chose to take as opposed to those classes required. Those would probably be called Required classes.
Transcripts and Course Catalog and Graduations Requirements work together to provide an accurate view of a student's academic career.
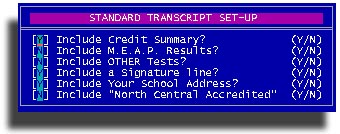
2.Print Transcript offers you two primary options: Print Standard transcript or Labels. You will be offered these additional options.
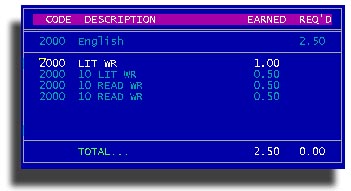
3.Credit Analysis will present this panel and ask if you want to perform a Detail or Summary analysis.
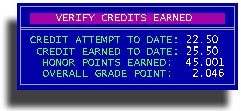
The Detail analysis will step through each requirement and show you the student's details relating to that requirement.
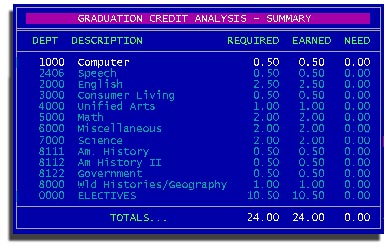
Whereas the Summary will show you, what else, the summary of the student's progress toward their educational plan. This process reads the student transcript an compares it against the graduation requirement assigned.
5.Mark Potential Graduate Use this to check and mark potential graduates. In this case, potential graduate means that the student has the potential to graduate at the end of the current enrollment period (or at the end of the year). If the number of credits already earned combined with the credit value of the classes currently enrolled would meet or exceed the graduation requirement, then the student is a potential graduate.
6.Record Actual Graduate This option will allow you to record the date the student graduated. This date is important to a number of reports found elsewhere. You will also be asked if this diploma was earned locally. This way you can record diplomas from other times or other schools.
7.Last School Attended allows you to record the name and address of the last school the student attended so you may communicate with the other school regarding such things as transcripts and health records.
8.Request Transcript Form from the last school the student attended. This option will print a "Transcript Request" form suitable for mailing.
You will visit this panel for each enrollment period that the student participates. After the first time, the values will be remembered. You will be asked for a valid Enrollment Period then enter local registration information.
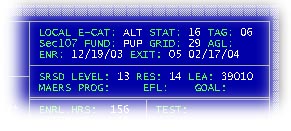
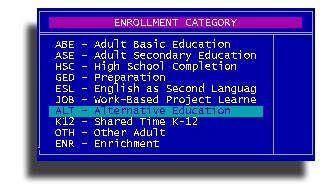
You will select the Local Enrollment Category from one of these. Just type the
code or press the question mark or leave empty and STUREC(c) will show you this
list. You don't get to make up your own. If you pick K12 you must also pick SRT
(Shared-Time) in the funding panel.
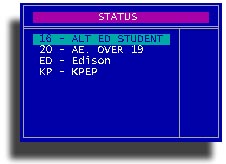
Next is the local Status code. This is a way to mark the student as a member of a group of similar students. Again, you may type the code, press question mark or leave blank to see the validation list. You create the validation list as may be appropriate for your district. See Menu:7.3.3.1.Status Codes
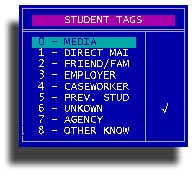
The same procedure for student Tags. Each student record must have at least one Tag, but you may have up to three. Some districts use tags to track their advertising effectiveness, or whether the student is New or Returning, or maybe an academic sub-program such as Cosmetology or Nurses Aid or Teen Parent. See Menu:7.3.3.2.Student Tags
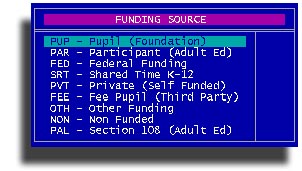
Section 107 Funding comes next. All youngsters under 20 without a diploma are considered Pupils for funding purposes unless they are Shared-Time (which is really a sub-set of pupil). Adults who receive state aid are Participants. Private funding is tuition students. Enrichment students may be either FEE or NON. Only PAL is PAL. If you select SRT, you must also pick K12 in the category panel.
If your student is Pupil funded, you will be asked this additional question regarding reduced schedule.

If you answer Yes then STUREC(c) will will adjust the FTE values to be based on an 80% schedule. If you declare that a student is eligible for reduced schedule, you are supposed to have signed documentation. Ask your boss.
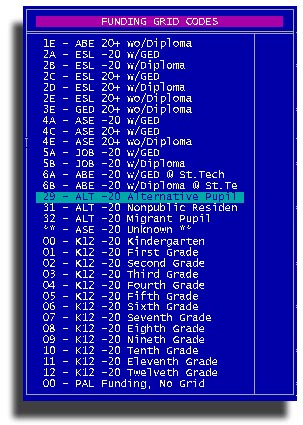
Now you are ready for Grid Code. This is strictly an FTE only type code, let STUREC(c) handle this, he's never wrong. Alternative pupils are always grid code 29 unless they are non-public non-residents, then use 31. Only use 32 Migrant Pupil if you are truly running a special Migrant program. Shared-Time students must be reported in their grade level.
Assigned Grade Level is something you assign (or not). It may be the student's more-or-less grade level or it can be any two character code you may wish to makeup. You may see a relationship between credits earned and Assigned Grade Level. STUREC(c) sees the relationship and will make a suggestion. There is no validation list for this code.
And finally you will be asked for the effective Enrollment Date. If this is the first time registered for the year, the date you enter will be stored as the Enrollment Date for the academic year as well as the specific enrollment period. If this is the first time ever that the student ever registered at your school, this date will also be stored as the student's original Enrollment Date. So, you see that this is fairly important to get correct. If you do make a mistake, as humans do occasionally, simply return to the Local Registration panel and when you get to the Enrollment Date, type in all ones [11/11/11] and STUREC(c) will recognize that as a signal that you want to review all of the various Enrollment Dates. Just follow the prompts in the message box at the bottom of the screen.
When you leave the Local Registration panel, you will be asked if you want to print a Registration form. Answer Yes or No. A registration form contains nearly everything you know about the student including schedule, if available yet. If the student is a Pupil then a line for parent or guardian signature will magically appear.
That's it for Local Registration, but you are not finished yet. Every student must also be recorded in the appropriate SRSD cycle. If the student is an adult, they must also be enrolled in a MAERS Enrollment Program.
Every eligible adult must be enrolled in an approved program. The first time you visit this panel, you will be asked if you want to Add a new program. After you have established a MAERS Program record you will be asked if you want to Add a new program, Edit the current program or Print a data sheet.
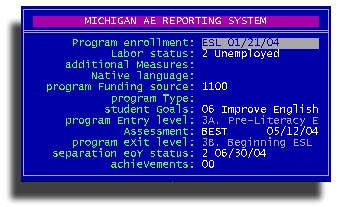
Program enrollment: There are four recognized adult programs: ABE, GED, HSD and ESL. If you have a real honest-to-goodness Family Literacy Program or Workplace Literacy Program or a real Program for the Homeless or you actually do run employer partnered Work Based Projects, by all means use one of those. In reality these additional "programs" are really sub-sets of the four basic programs and not actually real educational programs.
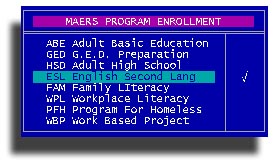
Anyway, you will be asked to declare the program from this list then you will be asked for the effective Enrollment Date. The enrollment date is the date the student signed the enrollment form. There can only be one program / enrollment date combination in a year. For example, a student could be enrolled in ABE on September 9th then enroll in GED on March 3rd the same year. Of course the ABE enrollment would have to be "closed" with a separation or end of year status code and date. This is very important because the Mystical Magical MAERS system uses the enrollment date as part of its "key" and therefore once entered can not be changed! After entering the date you will be asked to verify creation of new program enrollment. Look at it. If it is not correct, press the Escape key and do it again.
Now you can visit the various items that pertain to this student. The items on this panel may be accessed by moving the highlight an then press Enter or you may simply press the appropriate "Hot" key. The Hot keys are the ones Capitalized.
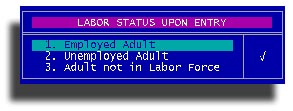
Everyone must have a Labor status. You may simply press the letter L to access this validation panel. Move the pointer and press Enter or just press the appropriate item number. All the items work this way.
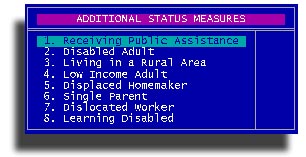
Not everyone has additional status Measures, but if appropriate, mark as many as apply.
If the student is a non-English speaker (ESL) you may want to enter their Native language. This is optional, will not be reported and is only for your convenience in planning for staffing.
Every eligible adult is 1. State Aid (Section 107) funded. Use program Funding source to record this.
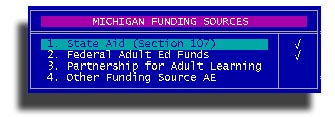
If your district has a Federal Grant, you may choose to checkmark all of your students with 2.Federal Adult Ed Funds in addition to State Aid. In some districts all students are marked as State Aid and ABE and ESL students are marked with the additional code of Federal. Some districts mark all students as both State and Federal if they have a Federal grand. PAL and Other Funding Source are incompatible with state aid or federal. Check with your local district or the nice folks in Lansing.
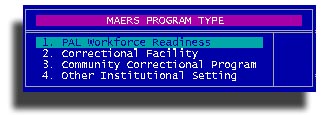
If the educational program you are delivering to the student fits one of these program Types, you may simply check it. Only one per customer. If none of these apply specifically, do not check anything.
Every adult student must have a Goal. These are considered "terminal goals" or final outcome goals. If you have a Federal Grant, you may not use one of the "Other" or soft goals.
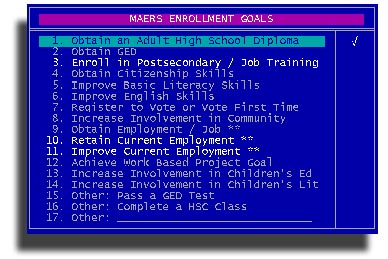
Some goal combinations are no-brainers. Some goals are program enrollment specific. For example, a student enrolled as a high school diploma student (HSD) should have a goal of Obtain an adult High School Diploma, or an employment related goal. Registered GED students should have a goal of Obtain GED. ABE or ESL students should have Improve basic literacy or English skills as their goal. Employment related goals are always an appropriate alternative. For a complete discussion of goal selection please consult the people who run MAERS.
Every adult in any program must be pre-tested and post-tested with an approved Assessment instrument. Let's say that again every adult in any program must be pre-tested and post-tested!
Program Entry EFL and exit EFL are determined by testing.
By the end of the year, every student must have a separation end of Year status
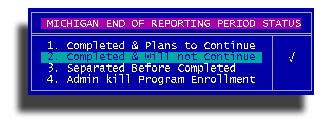
Completed, in this context, means that the student completed their enrollment period. If the student has not completed their personal goal and intends to continue within 90 days they should be marked with status 1.Complete & Plans to Continue. If the student completed their program or you know they will not continue you should use status 2.Completed & will not Continue. If the student separated (quit or dropped out) before completing then you would probably choose 3.Separated Before Completed.
If you simply made a human error and want to start over with a program enrollment, you may select 4.Admin kill program enrollment and it will be erased from the face of the earth. However, this last option 4.Admin kill Program Enrollment should be approached with caution. If your district is a batch participant and the student in consideration has already been "batched" you should not use Admin Kill because it will create an unclosed record in the state MAERS system and will be "Soft Exited" at the end of the year. Oh, dear! If you do not batch or the record has not been previously batched you may use Admin Kill. If the record has already been batched once, you should use 1.Completed and plans to continue then create a new program record with the appropriate data.
Please consult the people who run MAERS for current definition of these terms and concepts.
And finally, you may indicate as many participant achievements as appropriate, from this list of course.
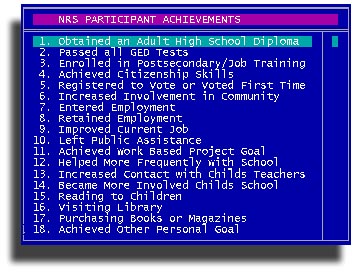
Remember that if a student did not have something as a Goal, it probably won't make much sense to mark it off as an achievement. STUREC(c) already knows some of the achievements. If they earned a high school diploma or GED (based on the date you entered for Actual Graduate) it will be checked. STUREC(c) cannot know if the student enrolled in postsecondary or job training, or got a job or a better job. Here again, if getting a job was not an original goal, marking it here won't get you brownie points. Please consult the people who run MAERS for current definition of these terms and concepts
Please remember that data collected for MAERS purposes and data collected for SRSD purposes are not interchangeable.
Everybody has personal information that you need to capture. Name and address of course. Also date of birth and place of birth, ethnic group and gender are necessary data.
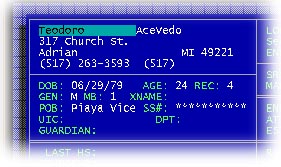
Next to the gender is a label "MB". What's that? It stands for Multiple Birth. This is so the geniuses in Lansing can tell if a student of yours is part of twins or triplets or such.
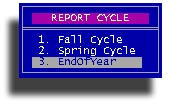
This is something we must do three times a year. Pick the appropriate reporting cycle because STUREC(c) stores the data separately for each cycle. You need to submit an SRSD file after the September count date, after the February count date and at the end of the year.
You need to visit each item on this panel to make sure it is correct for each reporting cycle.
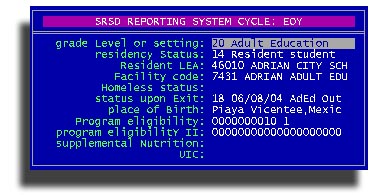
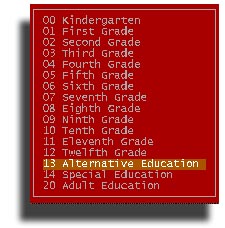
grade Level or setting. You probably deal mostly with adults who are coded "20" and alternative students who may be coded as "13" or the actual grade level. Please consult the people who run SRSD for current definition of these terms and to determine if your school district should be reporting youngsters as 13 Alternative or by their actual grade level. It has something to do with MEAP. You decide. Here are your choices. If you are running a Shared-Time program, use the actual grade level.
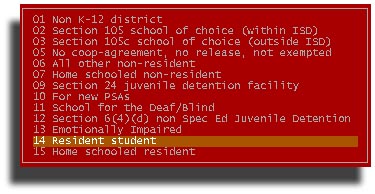
residency Status A code from this list. Shared-Time students must be coded with either 04 if out of district or 08 if in district. You will notice that those two codes are not in this list. That's because STUREC(c) already know this student is not a Shared-Time pupil. If you are not sure, ask your boss or use 06 All other non-resident or 14 Resident student as defaults.
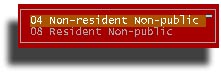
For Shared-Time you would see this list
Resident LEA If you have coded your student with one of the non-resident codes (1..6) then you must enter the LEA number of the student's resident school district.
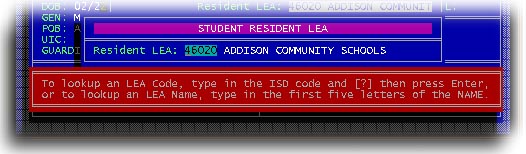
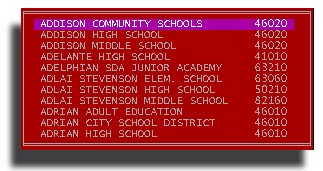
If you have memorized the other district's number, just type it in, otherwise you may type the first five letters of the district name and STUREC(c) will show you a list of matching names. Pick the one you want.
Facility code Unless you have been instructed differently, use the default Facility Code that you supplied when you setup STUREC(c) for the school year. For Shared-Time students you should use the building code of the actual building in which services are delivered. If you have been instructed differently, by all means do what the boss says.
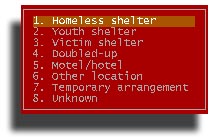
Homeless status Here is a no-brainer. If you know that the student is homeless, answer yes then select the residence / shelter type that applies. A note of caution. You may have an address for a homeless pupil, but you must leave the address empty for a homeless adult. It is a MAERS thing. Go figure.
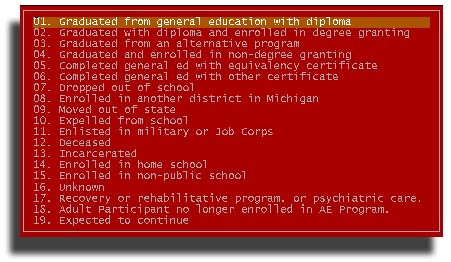
status upon Exit When a student drops, graduates or the end of the year, whichever comes first, you need to assign an End of Year Status code from this list. Advice: if you have declared that you are an un-graded alternative program, you should probably use code 03 when an alternative student graduates. If yours is a graded alternative program you should probably insert code 01. If you know that your student is enrolled in a degree granting institution of higher learning, ask your boss whether you should use code 02 or simply code 03 (if alternative un-graded program). This only allows one code.
place of Birth This one is easy. Where was the student born? For ESL students or other students born outside of the USA you should probably enter the country of birth. For students born in the USA you should try for the city and state, or at least the state if the student doesn't know where they were born.
Program eligibility This one you have to do on everybody. Youngsters, anyone under 20 without a diploma, (including Shared-Time) should be checked as Regular Membership. All adult participants should be coded as 8. Adult Education. If you check anything other than Regular Membership or Adult Ed, you will be asked for further details. Ask your boss.
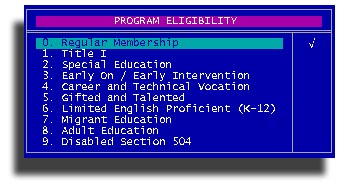
If you mark a student as Adult Education, you will be asked for a valid Participant funding code also. If your district has a Federal Grant, you should probably choose 2. funded for both, otherwise select 1. State only.

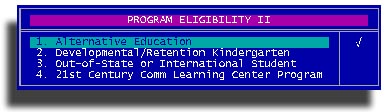
program eligibility II This was new at the end of 2002-03. Nothing applies to adults. If your student is in an Alternative Education program, check appropriately.
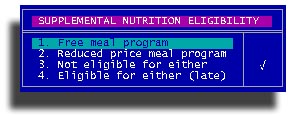
supplemental Nutrition Check as appropriate. This is not tied to the Social Services task item in any way.
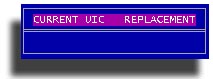
UIC Is the abbreviation for Uniform Identification Code. This code is always 10 digits and it is supplied by the state. If you have a new id code you can use this option to enter it into the student record. You will be shown the current UIC and you may put in a replacement. If the current one is blank then you do not have one in the file. Follow the instructions in the message box. You will be asked to type the code two times for accuracy.
STUREC(c) knows the current rules on these SRSD things, so if you choose to enter data contrary to published guidelines you may get unexpected results. Your district should be able to provide you with complete guidance regarding this SRSD stuff.
Please remember that data collected for SRSD purposes and data collected for MAERS purposes are not interchangeable.
This item gives you to ability to record nutrition, transportation or child care support information.
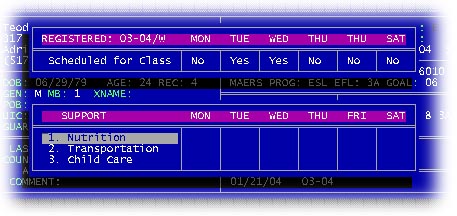
The top panel will show you the days that the student is scheduled for classes. In the bottom panel you may record appropriate support levels. Reports of this data can be found on Menu:6.1.Support Listings.
This function will safely guide you through these processes. If a student is not enrolled in the current year, the first three items will be unavailable.
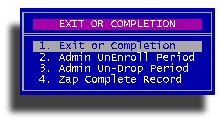
1. Exit or Completion will take you first to the SRSD panel where you
can check all the data for the appropriate reporting cycle and mark the status
upon Exit. If the student in focus is an adult, you will also be shown the MAERS
enrollment panel for appropriate action.
2. Admin UnEnroll Period may be used for a quick and easy way to drop all
of a student's classes, with the same drop reason, for a selected enrollment
period. This will not translate to the SRSD panel or the MAERS panel.
3. Admin Un-Drop Period reverses the action in number two.
4. Zap Complete Record will allow you to get rid of those pesky
duplicates or "comma" people. This one is not reversible.